- Gardening Tips |
- | What's NEW! |
- | Contact Us |
- | Sitemap
Rock Garden Designs - Step by Step
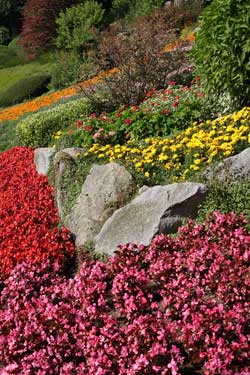
The aim in rock garden designs is to create a natural and harmonious combination between your choice of plants and the rocks. Note the emphasis on 'natural' here.
A successful rock garden takes quite a bit of planning! Just randomly tumbling rocks all over the place interspersed with some plants may end up like, well, a random mess. So let's take it one step at a time.
The Best Location for Your Rock Garden
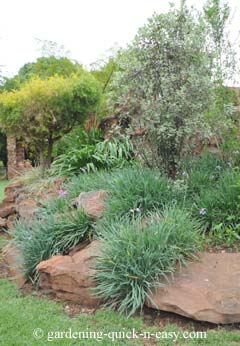
A sloping area in your garden is the ideal place for building a rock garden because it lends itself naturally to creating a terrace effect.
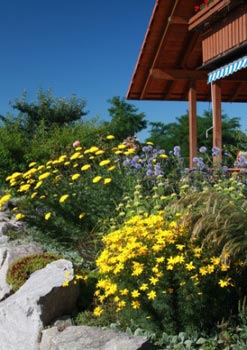
Alternatively you can create a rockery against a wall or at the edge of your decking - both to conceal crawl space and to create a lovely transition to your lawn area below.
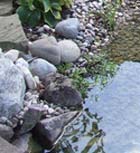
A rock garden can also look great as backdrop for your swimming pool!
You can also create a free-flowing rock garden if the ground is level as long as you keep it low.
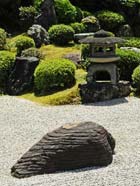
Your Rocks SelectionIf you do not have your own indigenous rocks, you should get rocks that vary in size but they should have the same appearance in color and weathering. It will not look natural to have a variety of rock-types in one location.
There is such a variety of artificial rocks to choose from too! They have the added advantage of being easy to transport and handle and if made well, are indistinguishable from the real thing.
Garden Design Detail
If you have a garden path as part of your rock garden design, you should try and match the colors of the paving stones or bricks with the rocks to create a harmonious composition.

Building Your Rock Garden
Start at the bottom with your first free-flowing line of rocks. Don't place them in a straight line and leave some spaces between them here and there for plants, unless the gradient is very steep and you are concerned that the soil will not hold. In that case you need to retain the soil and wait for the plants to grow and bind the soil.
Embed the rocks securely into the ground and place them with the most rugged (weathered) and interesting planes to the outside. Try and match the direction of the striations too if you can.
Take your time and view it from various vantage points of your property until you're totally happy with the size, shape and effect.
Working backwards and upwards, fill up with good compost-rich soil behind the rocks and cut away excess soil where necessary to create the next level upon which you will place your next tier of rocks - again leaving space for your plants.
Take care to fill up any air pockets too as much as possible so you will have a stable base and limited shifting or washing away of soil with time.
Note: The aim is not to create a wedding cake where all the tiers are level and uniform. You do want undulating levels and varying depth. Let the fall of the land guide you!
The SoilUse the best soil possible as you do the filling in. Once you get to the planting stage, you will further consider the needs of your specific rock garden plants and you will supplement the soil where needed. For example, you may need to add peat humus to acidify the soil (for those plants that prefer acidic soil) or add calcium for alkaline loving plants.
The important part though is to have enough, well-draining soil. Aim for a depth of at least 8 - 12 inches (20 - 30 cm) deep. Plants cannot thrive in too shallow soil, a common mistake made in rock gardens.
Rock Garden Plants
Rock garden designs typically consist of a kaleidoscope of tiny gardens nestling amongst the rocks. This does not mean that you must plant a different plant variety in each one!
Take note of the sunny and shadowy areas in your rock garden design and select your plants accordingly.
Note: You do not need to restrict your choice to drought resistant plants only!
And so the fun part starts!
Play around with plants that form round clusters, those that tumble and some that will give you height - perhaps towards the back. Check the information on your plants as to their height and spread and avoid plants with invasive roots.
Once you've positioned your plants, it would be easiest to start the planting process from the back and work your way downwards. Again, take your time. Once the "structure" is done, the planting can be done in stages.
Maintenance and Aftercare
After planting, add mulch and/or a top feed from time to time. Water as required and as in the rest of your garden, supplement the soil in spring with compost and fertilizer. Remove weeds as they appear and trim back plants where they threaten to take over.
We hope the information and pictures of rock gardens will give you inspiration for your own project - then do come back and show off and share!
Related Content:
To Top of this Rock Garden Designs page
Return to Gardening Tips Home Page
Gardening Updates
Note: We'd love you to show us how you did YOUR rock garden designs, to feature on our new pages!
Contact Us and we'll send you an email address that can accommodate your photographs.